橄欖球零錢包


! ! ! 各位好朋友 照過來


最近三惠愛上小零錢包


所以咩!


再來一個零錢包教學


老規矩 喜歡的就自己打包


沒有打包的


三惠感謝您來分享喔!


. 畫一張紙形 :


準備一張完稿紙 由中心畫一條16cm


上下兩端為


取兩端點處為圓規定點中心


朝正中心內測各畫一個半徑11.25的半圓


兩個半圓交會的地方


會行成一個橢圓形


這個橢圓形就是紙形


已經有含縫份囉!


.材料 : 表布4片貼鋪棉


裡布4片貼薄襯


滾邊條13.5cm X 30cm


拉鏈113cm


.表布4片分成2 正面對正面車縫一邊 裡布作法同表布


.表布的2 正面對正面車縫一邊(袋底) 裡布作法同表布


.裡袋套入表袋內


.袋口車縫上滾邊條


七.袋口縫上13cm拉鏈


.翻回正面 OK.....


這是底部


A060RO01-052


小迷糊 發表在 痞客邦 留言(0) 人氣()

鞋子手機袋作法分享


鞋子手機袋作法分享


~~歡迎打包~~


準備材料 :


B合貼表布++裡布共三層(要加縫份) 備用


作法說明 :


1 . A鞋蓋一邊貼上棉 打折處車縫↓


2.A鞋蓋表和裡 正面對正面 車縫含縫份的地方↓


3.C鞋翼左右各二片 正面對正面 一邊貼棉 車縫一圈 留返口4cm↓


4. A和C 各翻出正面壓線 返口藏針縫合↓


5 . AB組合固定(對齊前中心和a)↓


6.延著B邊車縫上滾邊條一圈↓


7 . 取C鞋翼訂上雞眼 再縫上鞋體的兩邊 藏針縫(要對齊 b 點和 f ) ↓


8 . 請自行加上提手 縫上皮釦 綁上鞋帶↓


謝謝 !!!


小迷糊 發表在 痞客邦 留言(0) 人氣()

分享~貓頭鷹零錢包作法~~下


將壓線圖案描好,燙好双膠鋪棉(單膠也可以),便可開始著手壓線。前片部份採落針壓,後片依圖案線條去壓。


壓完線拿出版型描好,往內約0.3公分去車一圈固定,之後再把眼睛縫上,沿著外型修減好。


接著要作內袋了.....


拿尺,畫出三條線,從布的尾端 2.5 、7.5、7.5。


燙好之後袋口處壓一道線,拿出版型畫好並車縫固定二側依外形修減


將表布及裡布背對背放好去做疏縫固定


要開始滾邊了


滾邊完成


做出中心線,要準備縫拉鍊了....


拉鍊縫好對摺以夾子固定,要做二側的捲縫


捲縫好之後車袋底,準備縫另一邊的拉鍊....


拉鍊縫好,翻回正面,貓頭鷹零錢包完成了。


小迷糊 發表在 痞客邦 留言(0) 人氣()

分享~貓頭鷹零錢包作法~~上


首先製作版型及裁布


於前片表布描上欲貼縫的圖樣


以珠針固定用藏針縫去貼縫。


同樣以珠針固定,只是布片內凹處要打牙剪


尖角處縫份要修小,其餘二片皆用同樣方法。


正面貼縫完成


用平針縫去拼接前後片


由於是用手縫拼接,縫份要倒單邊 (深色布方向)。但若是以縫紉機車縫則要將縫份攤開。


做到此先別急著把棉拿出來,因為後袋身要用布複寫紙將壓線把圖案描上。


待續.........貓頭鷹零錢包作法(下)


http://tw.myblog.yahoo.com/sung-jane/article?mid=1524&prev=1527&next=1504


小迷糊 發表在 痞客邦 留言(0) 人氣()

新款地圖包


新款地圖包立體有型,弧型底部,袋型飽滿,喜歡嗎?blog突破50萬人,引用即分享
引用後,請附上書寫姓名.住址之信封及郵票10元(不用黏貼,含影印費用及郵資)
截止日:101/11/30
作法:12月PO在BLOG上


弧型底


大尺寸側揹包,輕又挻,內部有2拉鍊口袋、2立體口袋與水壺袋,多口袋設計,使用方便,
一次購買2組材料包,免運費


材料包售價880元
表布:1y防潑水壓棉布
裡布:防潑水壓棉布
34mm雞眼扣
2條拉鍊
紙型與作法
真皮提把


真皮提把有6色:黑色.駝色.藍色..咖啡色.紫色,可供挑選


材料包:地圖


材料包:經典格


材料包:CK


材料包:GG


材料包:WW


材料包:學院風


滿2500,免運費


小迷糊 發表在 痞客邦 留言(1) 人氣()

分享國外作品 ~亮麗的針包


小熊找到不錯的網站分享給大家


做法很仔細哦 ^^


這款針包大家可以試做看看


送人也很不錯哦


請不要做商業用途哦...


尊重別人,也尊重自己


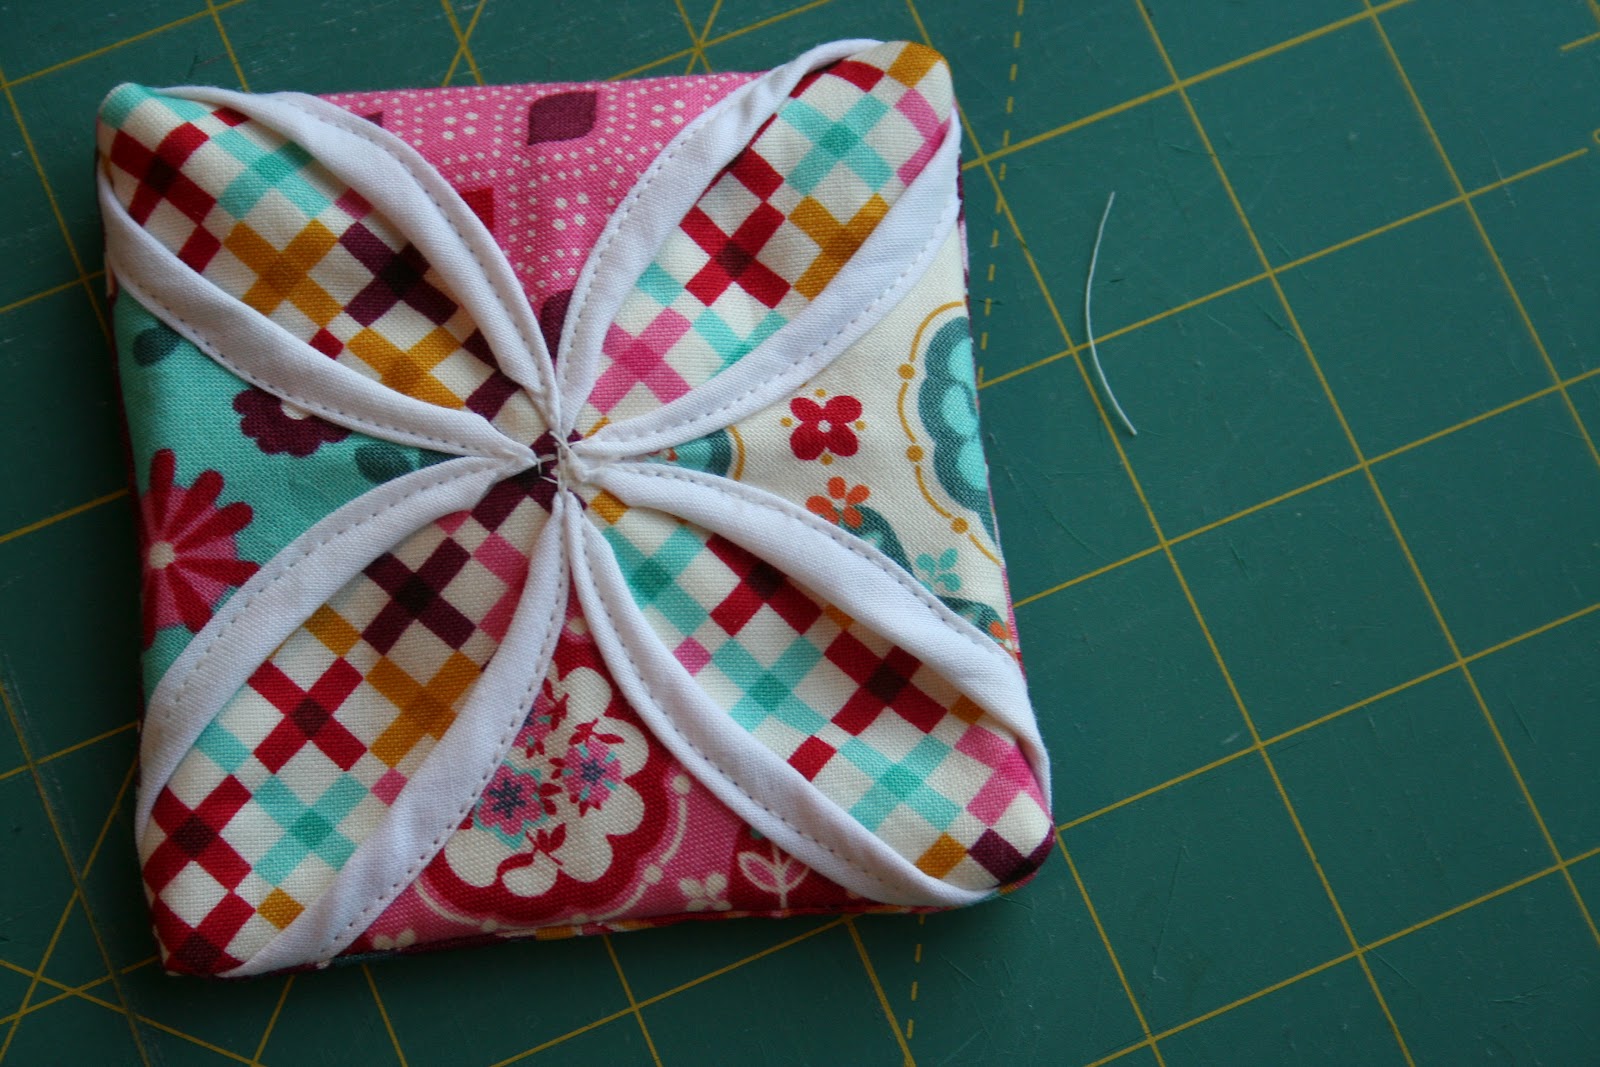
Cathedral Window Pincushion


An incredibly easy and beautiful pincushion. Makes a fast gift for the sewer in your life or for yourself since one can never have too many pincushions. If you thought cathedral windows were hard, I can promise that your mind will be changed after making this simple cushion.


one 10.5 inch square of Moda Bella solids white
nine 5 in squares of fabric or charms like Domestic Bliss
one button
thread
craft/button thread
stuffable batting


I used the very bright and colorful Domestic Bliss for a spring pin cushion.


Cut your solid square (or a print) 10.5 inches


Cut your template, I used a folder I found in the filing drawer, to 9 inches


Cathedral windows are mostly folding and ironing. Fold the corner over the edge of the template and iron into place. Then repeat on the other three sides.


Next fold the edges down and press. Repeat on the other three sides.


When the sides are pressed it will look like this:


Take the template out at this point:


Fold your square in half and press:


This is what it looks like if you fold one side back:


Fold the opposite way and press again. When you open your square it will look like this:


Time for more folding. Fold the outer corners in and press:


It will look like this when all four have been pressed:


Now do it all again. Fold each of the corners in and press:


Done with the folding/ ironing part!!!!


Trim one of your 5 in squares to 4.25 inches and place in the center of the open square.


Close the flaps.


Stitch the center to secure the flaps closed. This will not show so it does not have to be pretty!


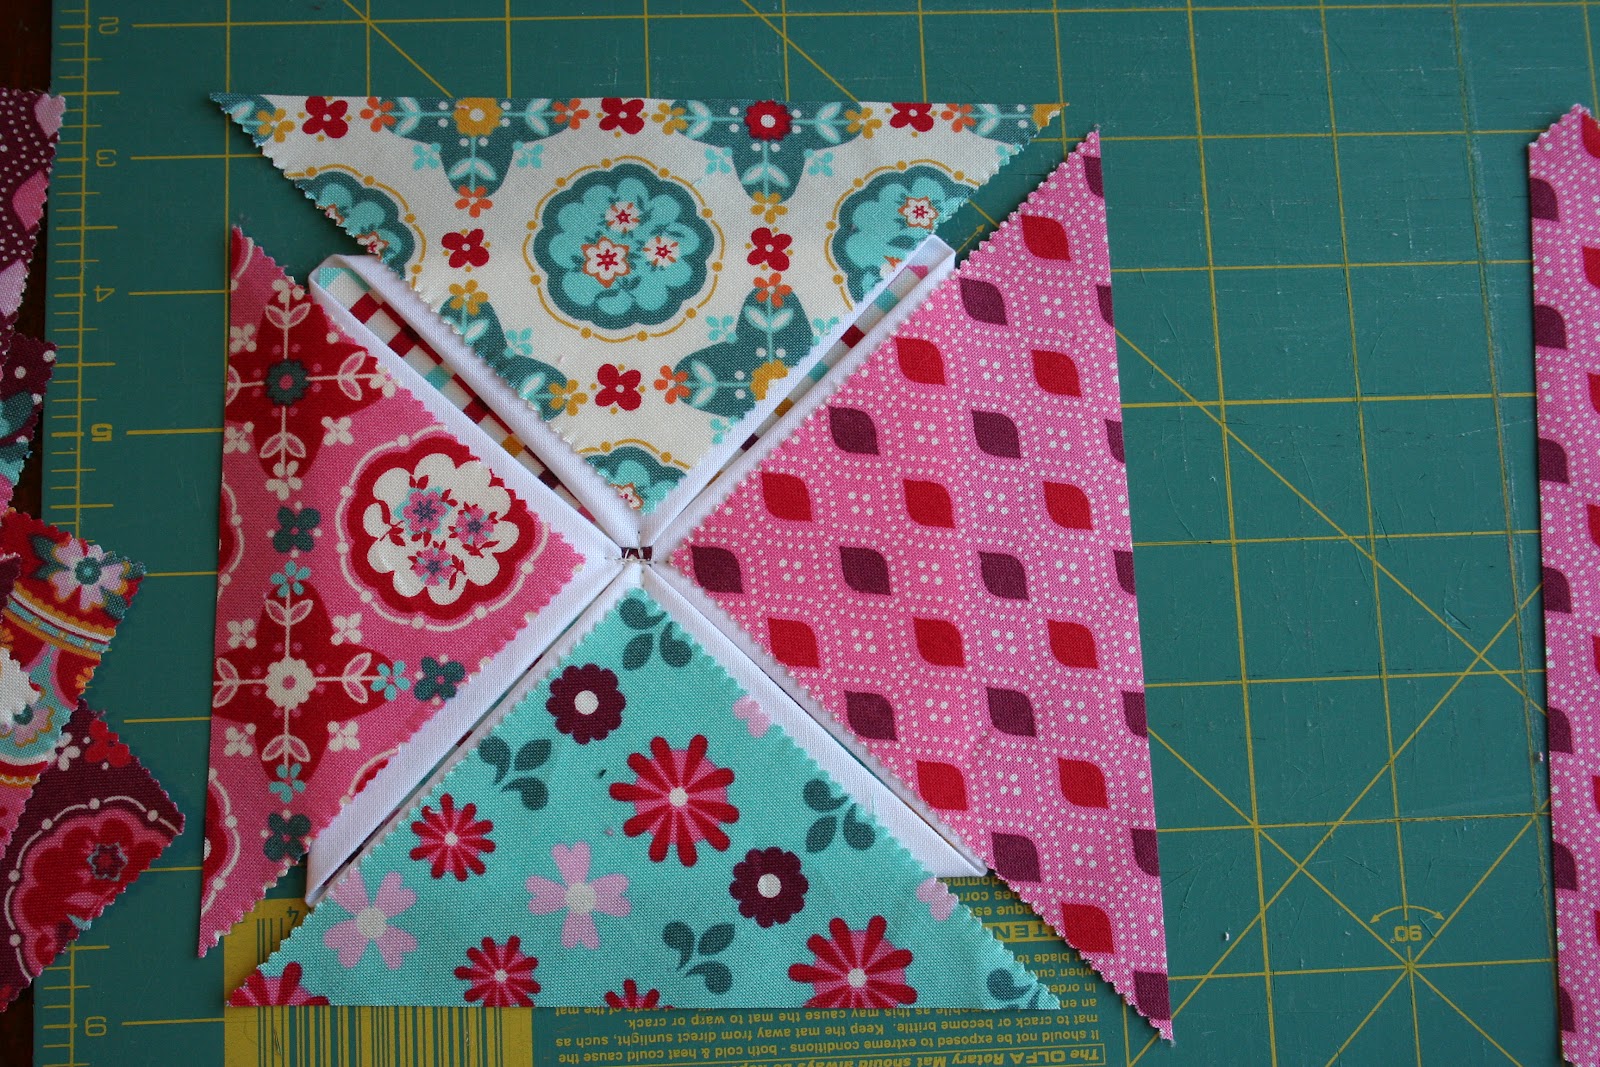
Take another of your 5 in squares and place in one of the triangles and trim.


Repeat with the rest of the charms.


Fold the edge of the flap over the triangle of fabric and pin into place.


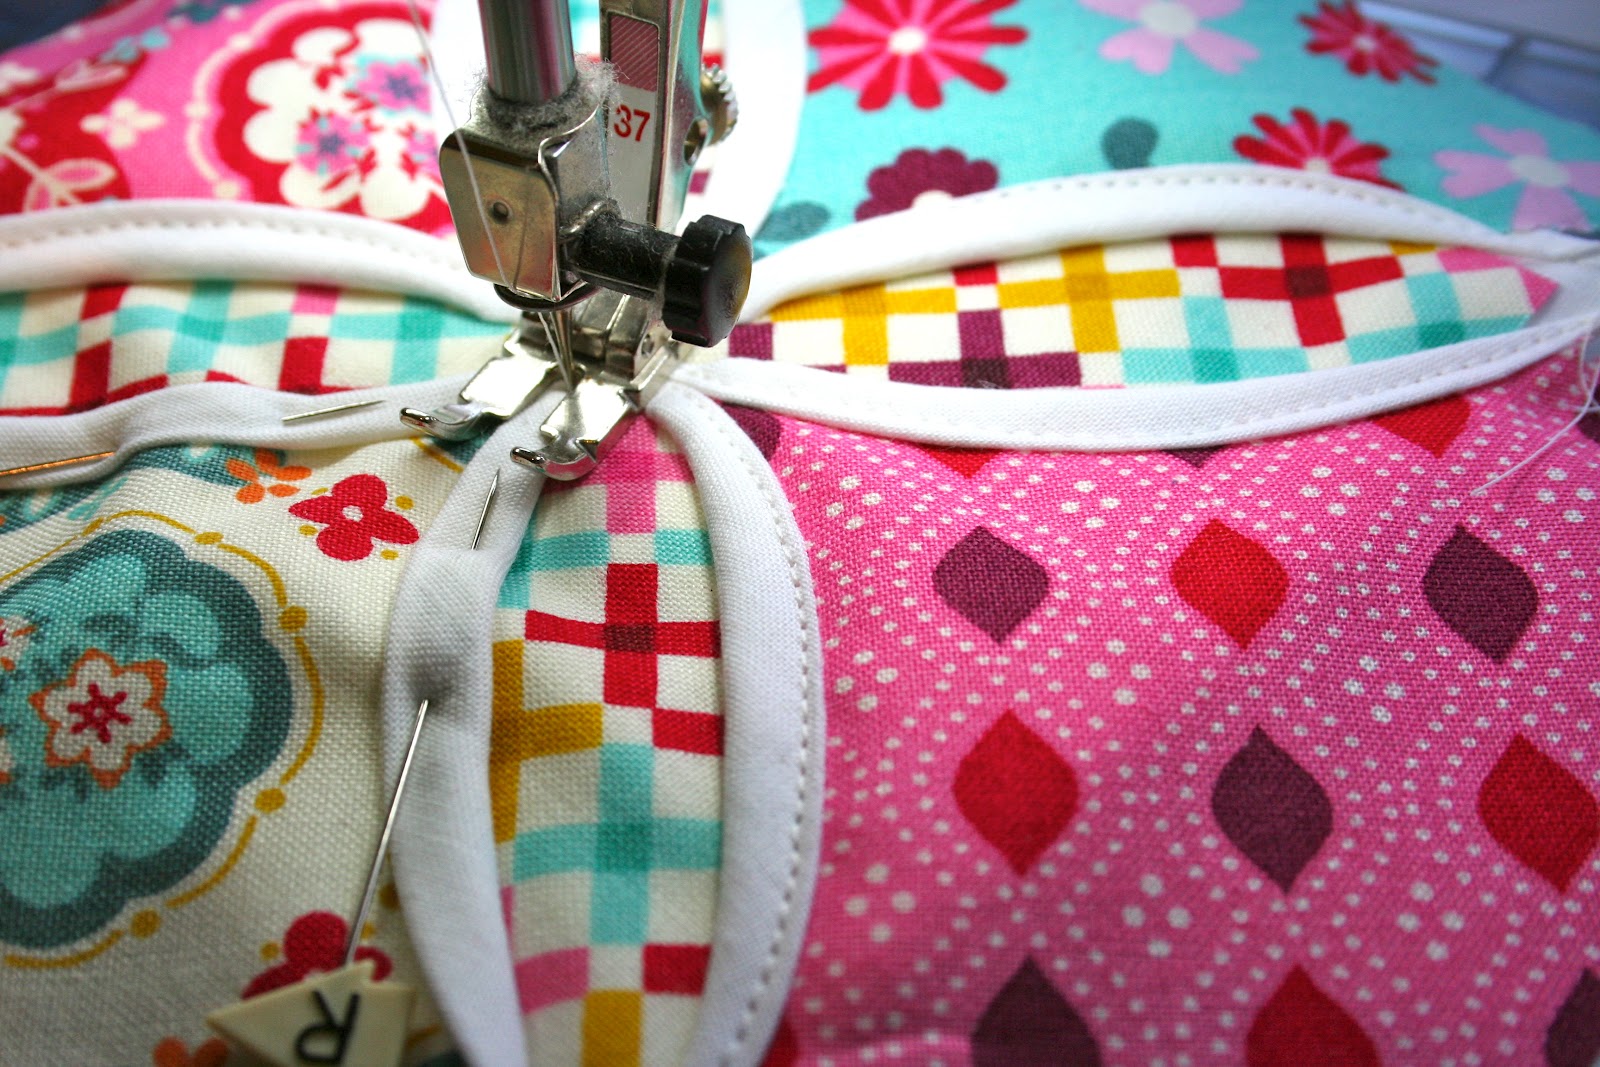
Sew to secure the flap. I used the inside of my 1/4in foot as a guide.


Repeat until you have all the flaps sewn.


Put the top aside and grab your last four charms,


Right sides facing sew them together on one side.


Repeat so you have two sets.


Press open.


Placing right sides together mark a 2in opening with two pins.


Using a 1/2 in seam sew up to the pin and do a little back and forth to secure where the opening will be.


Press the seam open.


This is the opening.


Take the cushion top and place it right sides facing and centered on the opening of the cushion back.


Using 1/4 in seam, sew around all four sides.


Trim the excess fabric.


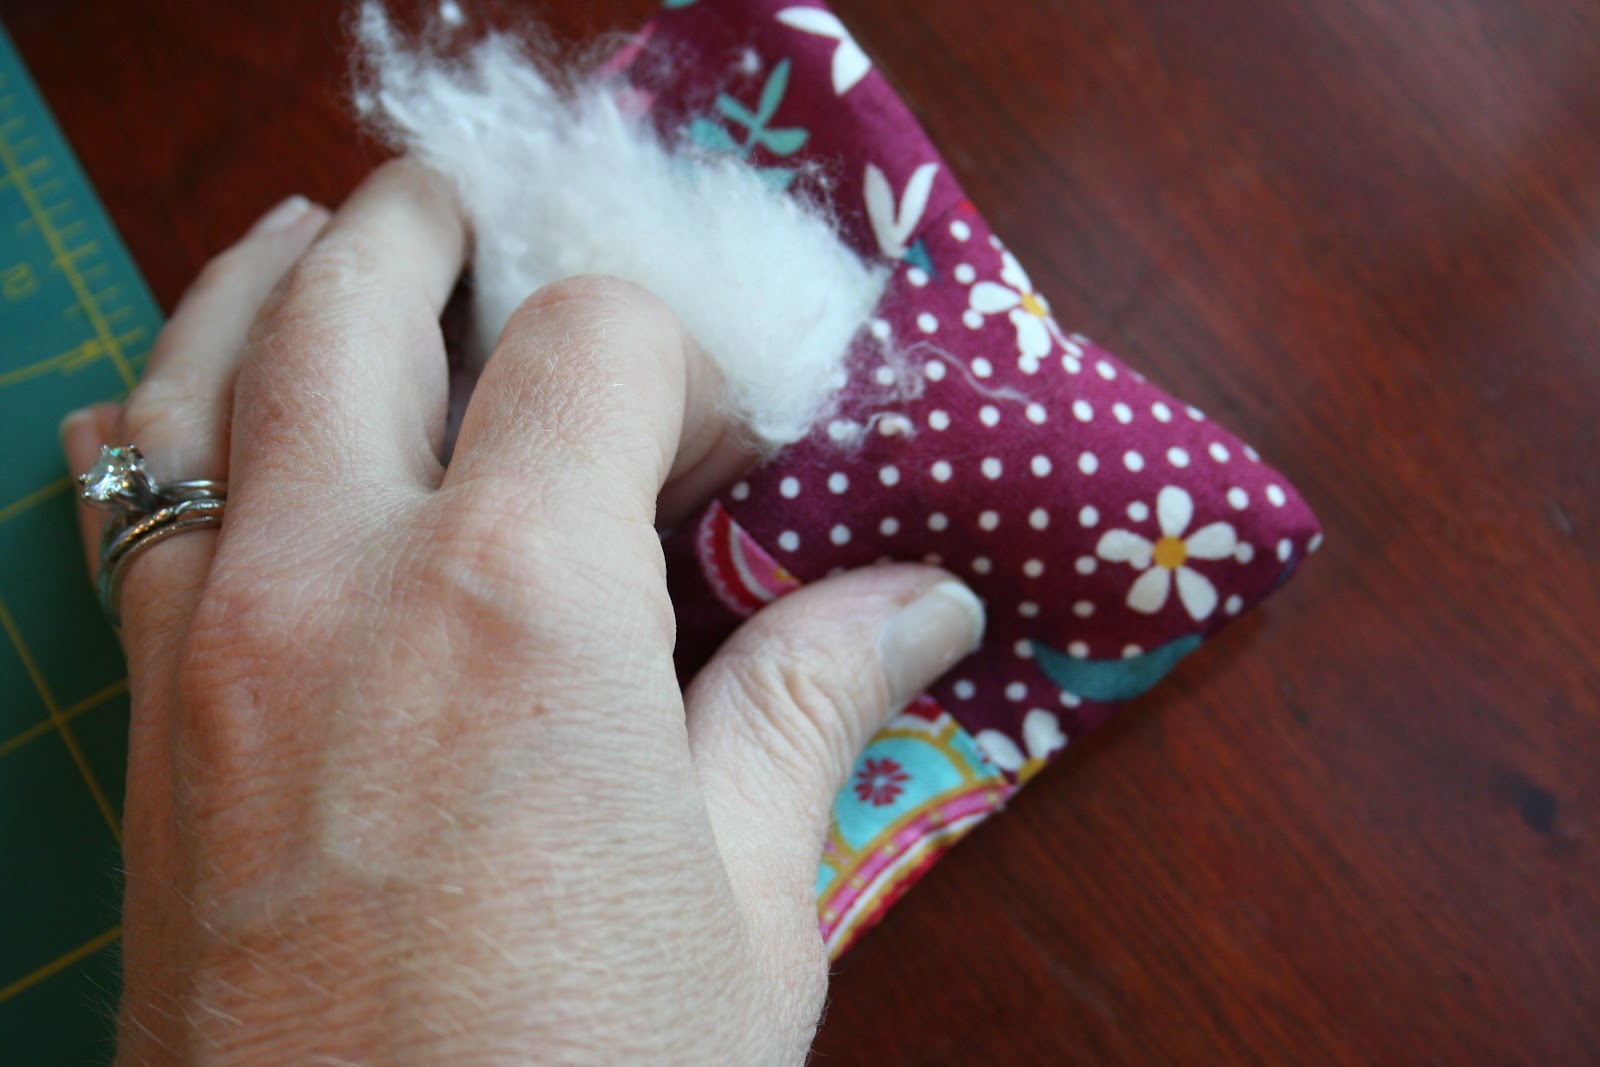
Turn the cushion right side out.


Stuff and stuff some more!


Stitch the back closed.


The best part...choose a button, attach it and you are DONE!!!!!


小迷糊 發表在 痞客邦 留言(1) 人氣()

樹上的魚寶寶,也很自由ㄛ.


小迷糊 發表在 痞客邦 留言(5) 人氣()

魔法魚


魚兒、魚兒水中游,咦!怎麼魚兒游到樹上去了呢?


圓圓、胖胖的身形,嗯!牠一定是一隻飼料魚。哈!女兒說牠是一隻深海的燈籠魚。因為前面的拉鍊頭太好笑了。


這是為北園國中志工團設計的拼布研習課程,可愛的造型兼具實用機能,又簡單容易上手,很適合初學者,是個不易失敗的作品喲!


喜歡嗎?紙型在下方,趕緊下載,一個工作天就能完成,還可以喝喝下午茶呢!


6月1日起材料包販售:250元 〈 請至賣場下單〉


小迷糊 發表在 痞客邦 留言(1) 人氣()

Kitty包作法


小迷糊 發表在 痞客邦 留言(1) 人氣()

魅力100,無敵的-KITTY


小小的kitty擄獲了大家的心,


看到它粉嫩嫩的又無辜的表情,真是讓人迷醉。


沒有嘴巴的她,是智慧的--言多必失。


就因為她的不言不語,跟大家是多麼的親近啊!


因為無須言語,就已經心神相通。


粉紅清純,或是紅火熱情--------ㄧ樣可愛,ㄧ樣Q


喜歡嗎?妳也應該擁有一個--------and更多。


心動嗎?馬上行動吧!


與大家分享kitty的紙型,如果製作上有任何問題,也歡迎大家一起討論。


請自行縮放比例


將內容稍為更正,希望能更清楚。


如果放大成側背包請加上拉鍊口布,至於口布大小請自行斟酌。


本次發表作品屬小零錢包-----寬13公分、高9公分


小迷糊 發表在 痞客邦 留言(0) 人氣()